Happy Wednesday!
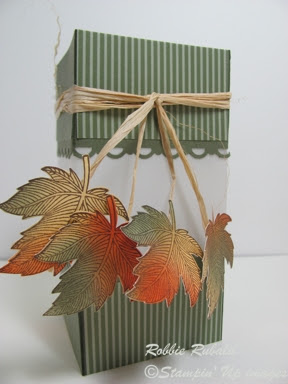
I usually try to do the Stamp-a-holics challenge each week and when I saw this one I thought I might be able to combine it with my project class for the month. Their challenge is to create a 2-4-6-8 box. There have been a lot of luminaries on blogs lately and I thought it would be fun to do a class this month and make a Thanksgiving one. When I saw the challenge at their blog I decided to modify the box and see if I could make a luminary.
Since this was a 3d challenge we were given 45 minutes. I began by deciding what size I wanted for my box (2 1/2″ square by 5 1/4″ tall). After that I had to determine my height and figure out how much of that I wanted to be vellum. After I had my pieces cut I had to get the scoring determined. This took a little figuring out and I thought I had it. When I scored it, it did not turn out right. So I stopped the clock and played some more to get the right dimensions for my scoring.
After I had the correct scoring, I started the clock again and scored all my papers and the vellum. Next I punched the edges with the scallop trim punch. I cut my ds paper to fit the space and attached it. Now I could apply my sticky tape. Oops I had to stop the clock again as my little lady had to go outside to do her business.
After a little break (had to sweep the driveway and get the mail) I started the clock again and attached the vellum to one of the cardstock pieces. Then I had to take a few minutes to figure out how to attach the other side so it would close correctly. After attaching the 3 flat pieces, I then closed the box and had my luminary. When I put the candle inside, I thought it was too tall, so I cut a half inch off of each end and it was the perfect size then. I then needed to decorate it. I wanted to wrap some raffia around it and attach fall leaves to the ends.
I used sponge daubers to apply color to cardstock. I then stamped my leaf with Staz-On Timber Brown and cut them out. I wrapped my raffia around my box and tied it in a knot. Uh-oh my timer just gave me the 1 minute warning but I am doing good as I only have attach my leaves. I had 3 attached and could not find the 4th. I searched and searched and finally found it. I attached the last leaf just as the timer was going off. I made it in time and with that being said here is my final creation.
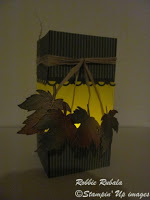
luminary with lights off
Hope you enjoyed my project for today. Thanks for looking and have a Great Day!
Robbie


This is just lovely. The leaves are perfect! Thanks so much for playing along with us this week.
Cynthia
I love it and the leaves are beautiful! I may have to try this.
Robbie the luninary was just beautiful. I loved the colors of the leaves. That's a great idea on daubing color on cardstock and then creating the stamped leaves. Great project design. Sandy
I love luminaries and this ranks right up there with the best of them. Thanks for sharing.
Theresa in Kitimat
Fabulous – luminrias are so wonderful….if you are willing to do a how-to for us…you know we will jump at it! Thanks for sharing another great project!
What a great way to use the 2-4-6-8 box! I love your idea and thanks for playing along with us this week.
Mitzi