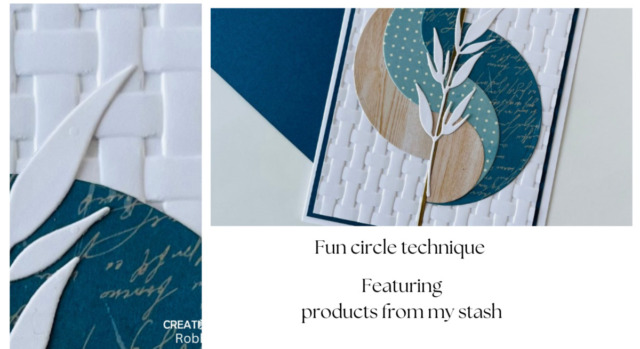
Fun circle technique
Hello everyone – if you have circle dies then you can #ShopYourCraftStash and create a card with this fun circle technique.
I ran across a technique I did 6 years ago and decided to revisit it in a simpler idea. All I needed was circle dies and some pattern paper from my stash.
Today’s Project
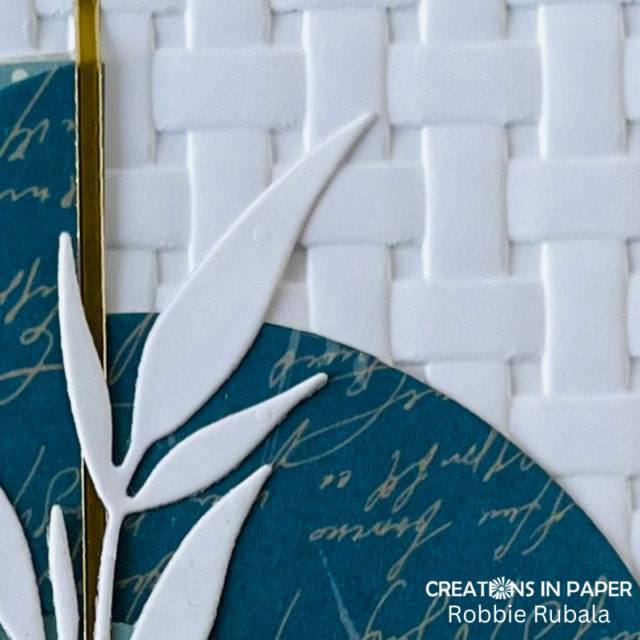
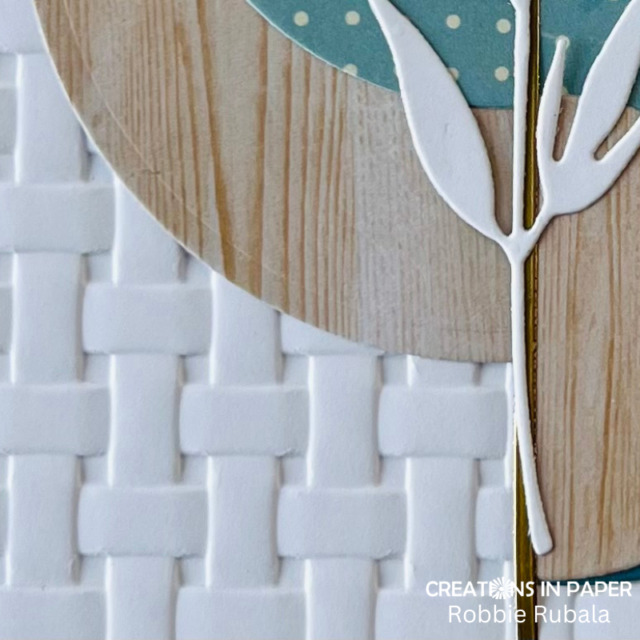
Begin with 3 different sized circle dies – I used a 3 1/4″, 2 3/8″, and 1 5/8″. Grab 3 coordinating pieces of pattern paper. Cut your circles in half and layer them. Put the 2 circles together and offset them to create the fun swirls. Use a strip of metallic paper or some thin wash tape to cover up the edge where the 2 circles are joined.
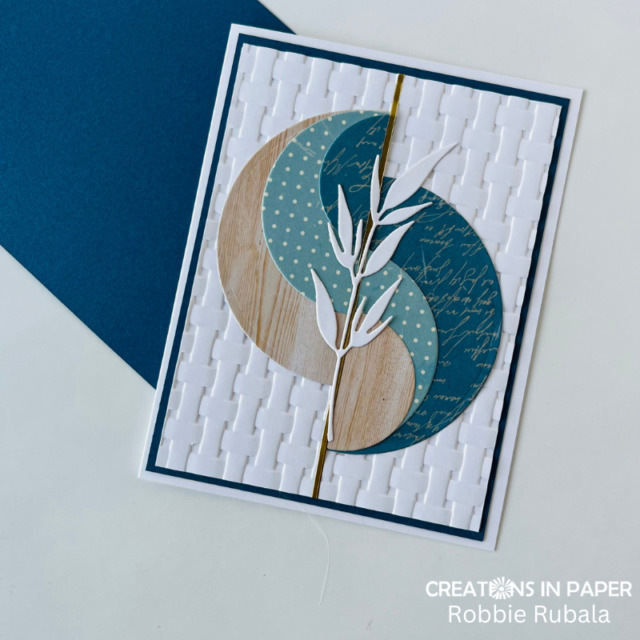
To add some interest, use an embossing folder to add some texture to the background. Finish it off with a die cut. I used a leaf so it could be used as a masculine idea. Change the die cut and he paper to make it feminine.
Watch the video to see how to make the circle element
When you click the link above, choose “Watch on YouTube” and please subscribe so you get a notification there when I post new videos.
Check out this card that uses the same idea as the technique used on this card. Here is another technique you can do using a circle die.
Details for this technique idea
white cardstock – 5 1/2″ x 8 1/2″ scored at 4 1/4″
3 13/16″ x 5 1/16″
scrap for die cutting
blue cardstock – 4″ x 5 1/4″
3 different pattern papers – scraps for die cutting
Products used to make the Fun circle technique card
pattern paper – from your stash
gold peel off stickers – Love from Lizi
embossing folder – from your stash

Did you like this idea? I have to admit this Fun circle technique idea was easier to do than the one I did 6 years ago. This will definitely be one I do again.
Have a Sensational Sunday!