I am so excited about my project today. When I started on this each time I completed one part it sparked an idea for another part.
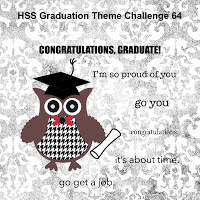
Over at Hand Stamped Sentiments we have a graduation challenge this week.
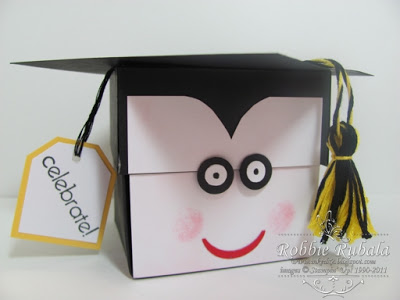
I thought it would be fun to use the box I used last week for my Easter project and make a mortar board. I tried to think of how I could do a tassle and my first thought was to use paper and create one similar to the one I did for my daughter’s graduation picture. As I was working on the box, I had a brainstorm to use embroidery floss for the tassel. I got some of my yellow and black floss and began wrapping it around my ruler. When I had enough of the floss for the tassel, I took another length of each color and twisted them together. I then threaded this through the wrapped floss on the ruler. I could then pull the floss off the ruler to tie (in hindsight I should have tied it in a knot at the top). I used another piece of floss the tie the floss near the top then cut the loops to form the tassel. I threaded the ends through a hole in the mortor board and taped them to the back. I added a brad for the knob at the top and it was done.
When it was finished I thought it would be a good idea to make a tag that said “Celebrate” from the box. I made the tag and then hung it from under the mortar board and attached this to the box. Then it hit me, wouldn’t it be cool if I had a face on the box to actually show a person. So I started working on it. I cut a rectangle and figured out I could cut it apart where the top meets the bottom. So I did that and then I thought the white was too harsh so I sponged on some Pink Pirouette to give the person some pink skin. Next I sponged on some Pretty in Pink for cheeks. Now I needed to cut the top to indicate the cap of the mortar board on the forehead. I pulled out my embossing jar and used it to make the curve on each side that joined in a point. It was perfect so I used my pattern to trace and cut out the shape on my forehead. It was perfect so now the only thing left was my eyes. I pulled out my 1/2″ circle punch and punched black circles. Then I had to do the whites. I could not find my 1/4″ circle punch so I went looking and realized the center of the smallest daisy die would work. So I cut out 2 and finished my eyes. I attached them to the top using small glue dots. It was now complete. Here is what the final project looks like. Let me know what you think.
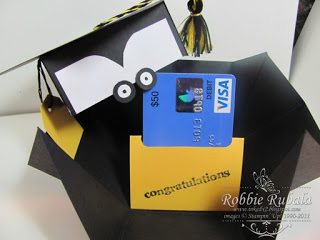
inside of box
Hope you enjoyed my graduation project. Make sure you go over to the Hand Stamped Sentiments blog to see what the other design team members created. Thanks for looking and have a Terrific Tuesday!
Robbie


Super cute box! So clever to put a face. This gift will bring a smile to any grad's face. Love it!
Robbie- great project! I love that box, I think that would be such a great project for place settings and party favors- nice job VERY PRETTY!!!
oh how cute is that 🙂
Robbie, you are such a GENIUS! that's the cutest box ever!