Stampin’ Up Dandy Wishes
Hello Everyone – I love the dies in the Stampin’ Up Dandy Wishes set!
We had a great time last night in our Ladybug stamp camp Zoom. Needless to say I am playing catch up today.
When I saw the dies in the Stampin’ Up Dandy Wishes die set I knew I would use the flowers to make cute flowers for my cards. Don’t you just love this adorable flower on my fancy fold card?

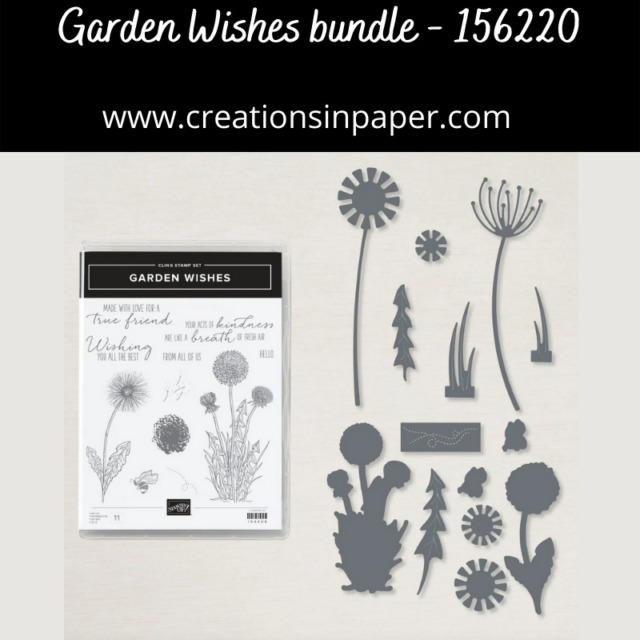
The Dandy Wishes dies are part of the Garden Wishes bundle that is currently on sale for 20% off this month only. I shared the entire bundle as the stamp set has some great dandelion images that make cute cards also.

Purchase this bundle to save 20%!
Check out this close up of the flower. It is so cute!

I used the Dandy Wishes dies to make these cute flowers also.
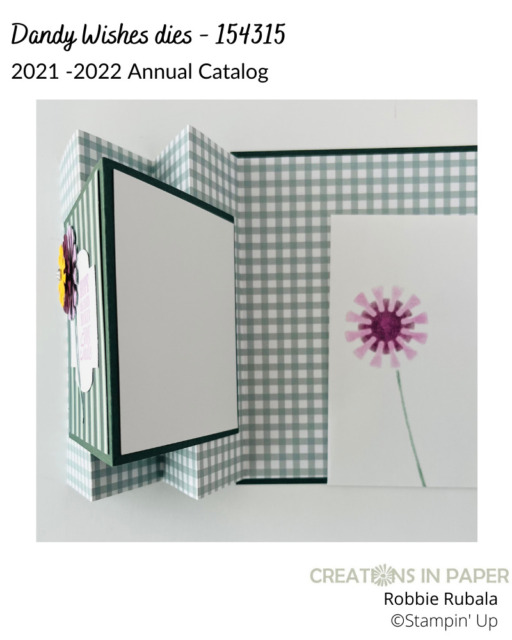
So you have a better idea of how the card works, here is the card open with the envelope.

Measurements
Card Base: Evening Evergreen 4 1/4″ x 5 1/2″ and 3 1/2″ x 7″
Blackberry Bliss: scrap for die cutting
Fresh Freesia: scrap for die cutting
Mango Melody: scrap for die cutting
Soft Succulent: scrap for die cutting
White: 3 1/4″ x 3 1/4″ and scrap for stamping and die cutting
Pansy Petals pattern paper: 5 1/4″ x 11″ I used the soft Succulent plaid pattern and 3 1/4″ x 3 1/4″ I used the striped pattern
Step by Step
- using the long piece of pattern paper, score it at 1 3/4″ , 3 1/2″, 5 1/4″, and 7″
- accordion fold on score lines starting with a mountain fold – this should fold up into stacked folds on top of a 4″ x 5 1/4″ panel
- add adhesive to the back of the large pattern paper panel and adhere it to the piece of Evening Evergreen
- wcore the 3 1/2″ x 7″ piece of Evening Evergreen on the long side at 3 1/2″, fold and burnish on the score line
- with the fold on the right, add the piece of striped pattern paper to the front of the Evening Evergreen
- keeping the panel closed, flip it over and add the White panel to the back
- we are going to adhere the little folded card to the folds on the card base – open the small card up, keeping the folds of the pattern paper together, flip the fold back so you see all the large panel of pattern paper
- center the small card on the fold of the pattern paper and make a light pencil mark on each side – this will tell you where to add your adhesive
- add adhesive to the back edge of the small card that has the white panel on it
- add adhesive to the edge of the fold of the pattern paper between the pencil marks
- attach the small card to the pattern paper so the edge of the card is about 1/4″ away from the score line on the card base
- now we need to attach the front panel – open the small card, flip the pattern paper folds over onto the card base, close the small card on top of the pattern paper folds and use a pencil to make a mark on each side of the small card
- add adhesive to the back edge of the small card and to the edge of the folded pattern paper between the marks you made
- keeping the pattern paper folded, close the small card on top and hold to ensure a good grip Note: when you open the card by pulling the top pattern paper fold the pattern paper does not open all the way but creates an accordion fold allowing you to set the card up for display
- stamp you sentiment ont a scrap of White and die cut it using the Stitched So Sweetly dies so that the sentiment is to the right of the shape – see photo above
- glue the sentiment panel to the front of the small card
- use the Dandy Wished dies to die cut the following
- flower – Soft Succulent
- flower head only – Fresh Freesia Note – I cut a little of the stem also and just trimmed it off
- middle flower die – Blackberry Bliss
- smallest flower die – Mango Melody
- Layer the flower as below
- Fresh Freesia flower onto top of Soft Succulent flower using glue
- Blackberry Bliss flower on top of Fresh Freesia flower offsetting petals using dimensional
- Mango Melody flower on top of Blackberry Bliss flower offsetting petals using dimensional
- trim the stem of the flower and adhere to the small card front so the flower is in the upper left hand corner of the sentiment panel- see photo above
- add rhinestone to center of flower
March Host Code – HNSQQKGF
Use this host code when your order is under $150 and receive a free gift from me! If your order is over $150, please do not use this code, but you’ll still get the free gift.
***Make sure that you can see my name on the final checkout page listed as your Demonstrator when you order so that you know that you’re ordering with me and you’ll get my rewards!
Supplies used for the Stampin’ Up Dandy Wishes card
Product ListThanks for visiting me today and I hope my Stampin’ Up Dandy Wishes creation has inspired you.
Have a Sensational Sunday!


