Stampin’ Up Merriest Moments Joy
Hello Everyone – I love the soft colors used to create the Stampin’ Up Merriest Moments Joy card.
Do you use the catalog for inspiration? I love finding cards in there to put my twist on it. The Facebook Group CASEing the Catty Sunday Challenge had a fun challenge this week. We were to CASE a non-Christmas card and give it a Christmas twist.
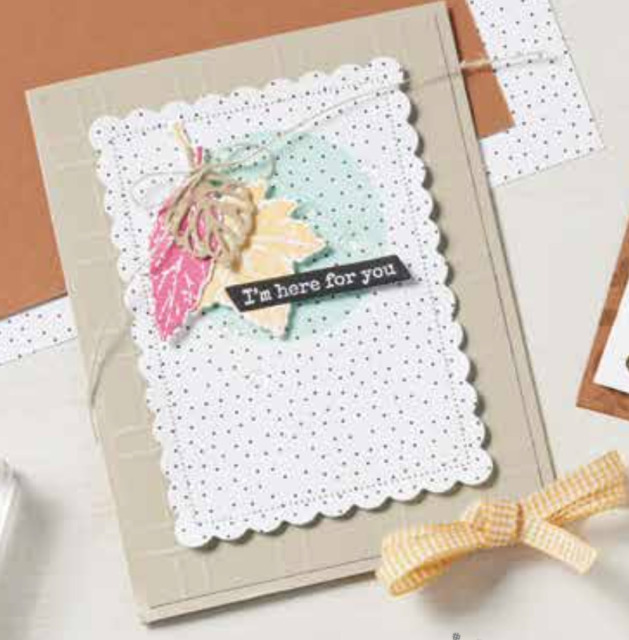
I pulled out my June – December catalog and sat down and looked at the non-Christmas sections. I found the perfect card on page 47.

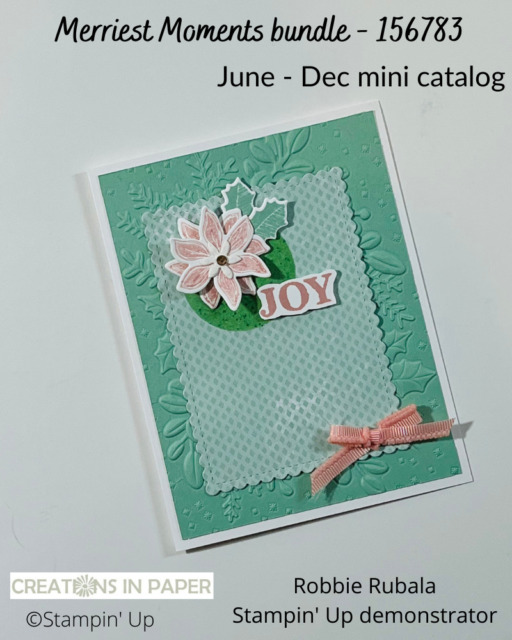
Once I saw this card I knew I wanted to use my favorite colors pink and green. I just ordered a stamp set that is carrying over and had not used it yet. Here is what my card looks like using the Merriest Moment bundle.

When I looked at the card in the catalog I saw there was a panel of pattern paper on the front. I found a simple pattern in the Whimsy & Wonder collection. Here are the steps to creating this card.
Measurements
Card Base: White 5 1/2″ x 8 1/2″ scored at 4 1/4″
background layer: Mint Macaron 4″ x 5 1/4″
Whimsy & Wonder pattern paper: 3 1/4″ x 4 1/4″
White: scraps for stamping and die cutting
Let’s make it!
- use the Stitched So Sweetly dies to cut out the pattern paper
- create a stencil using the Layering Circles dies, stamp the sprinkle using Mint Macaron ink inside the circle
- sponge Mint Macaron inside the circle template
- emboss the background layer using the Merriest Frames hybrid embossing folder
- attach embossed layer to card base using Tear & Tape
- add the pattern paper to card front using Tear & Tape
- stamp all the following with a second generation each time – small poinsettia 2 times using Blushing Bride, small leaf 2 times using Mint Macaron, and the sentiment using Blushing Bride
- use the dies to cut out the flowers and leaves
- use the smallest flower and Shimmery White card stock to cut out the flower
- use your snips to cut out around the sentiment
- layer the flowers using dimensionals
- add the smallest flower to the center with a glue dot
- add leaves with glue dots
- attach flower using a dimensional to the upper section of the circle
- add a Champagne rhinestone to the center of the flower
- attach sentiment using dimensionals under the right part of the flower
- cut the Blushing Bride frayed grosgrain ribbon in half, tie a small bow
- add the bow to the lower right hand portion of the pattern paper with a glue dot
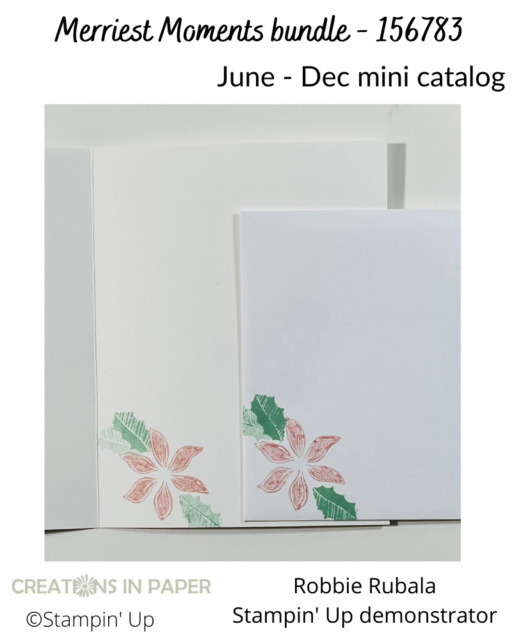
Don’t forget to stamp the flower and leaf on the inside of the card and on the envelope.

I have loved using poinsettias in my Christmas card making this season. Check out this pink poinsettia with some green pattern paper. Look at this idea that uses a vellum poinsettia with a blended background.
November Host Code: FPGQ7TRV
Use this host code when your order is under $150 and receive a free gift from me! If your order is over $150, please do not use this code, but you’ll still get the free gift.
***Make sure that you can see my name on the final checkout page listed as your Demonstrator when you order so that you know that you’re ordering with me and you’ll get my rewards!
In case you need to add these great products to your stash, click on the image and it will be added to your cart.
Stampin’ Up Merriest Moments Joy products
Product ListI hope you have enjoyed all my poinsettia cards I have shared this past month. I have had fun playing with all the different colors and designs. Thanks for stopping by to see my Stampin’ Up Merriest Moments Joy card and I hope I inspired you to make a poinsettia card. Have a Wonderful Wednesday!


