Happy Friday Stampers!
I hope you have some fun plans for today. It was supposed to snow last night so I was hoping I would get my 3 workshops in today. In between and after them Jess and I will be working on things for Remi’s first birthday. We have some things we want to make. I will be sharing them with you. I still can’t believe she is going to be 1 year old! Where did the past year go?
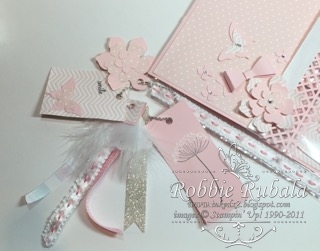
Last week I shared the Pink Pocket Letter I received from my friend. Today I am going to share the Pocket Letter I sent her.
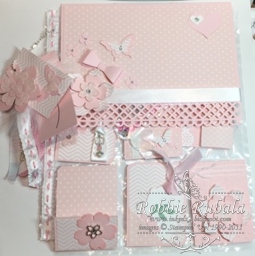
I began by pulling my Pink Pirouette card stock and Pink Pirouette patterned paper stack. I saw in a video where someone had made a large flap for the front of her pocket letter. I decided to make one for my pocket letter. After I had the flap created, I punched the bottom with a border punch I have. I then added some patterned paper to the flap. I needed a way to keep the flap closed, so I attached a mini magnet I had to the back of it and then wrapped a ribbon around the flap to hide the magnet. I attached the ribbon in the lower left hand corner as I could then use my punched flowers to hid the seam. I punched my flowers as well as a bow and some butterflies. I added a heart in the upper right hand corner. I topped my flowers and butterfly off with some rhinestones. My flap was finished now to move on to the pockets.
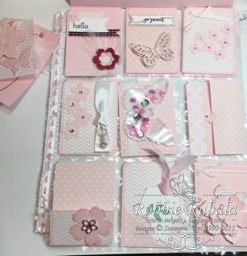
I created a variety of different designs for the pockets. I added some sentiments, I created a butterfly shaker pocket, a jeweled stick pin, and several interactive pockets. I added my magnet to the middle card pocket and then covered it with paper and a punched image. The magnets are used to hold the flap down. I also added some ribbon down the punched spine and punched holes so it could be added to a binder. Here are the pockets for my pocket letter.
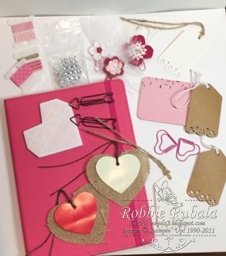
Now that I had the front of my pocket letter and flap completed, I needed to add all my goodies. I had picked up a few things here and there and also made some cute items she could use for other pocket letters. I included some washi tape, rhinestones, tags, shaped paper clips, flower embellishments, and a bright pink notebook. Here is a picture of all the items.
To finish off my pocket letter I wanted to make a charm to hang from the top hole. I stamped an image on a strip of paper, cut a piece of glimmer paper, created a ribbon tag with ribbons, tulle, and feathers, as well as another punched flower. All of the paper elements I covered with mod podge to protect them Here is the picture of the charm.
Stampin’ Up supplies used to create my Pocket Letter
Thanks for visiting me today. I hope you enjoyed my pocket letter today. They are lots of fun to make. What would you do if you made one. Have a Fabulous Friday!
Robbie