
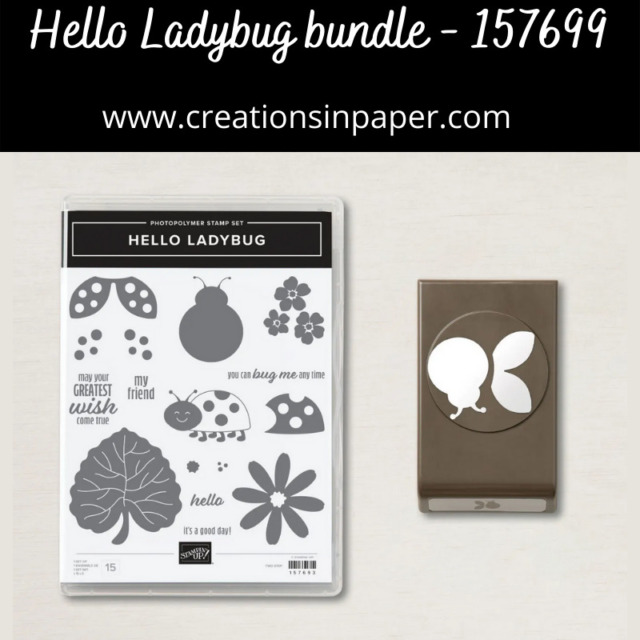
Stampin’ Up Ladybug Builder Punch
Hello Everyone – wait until you see how I used the Stampin’ Up Ladybug Builder Punch on today’s card!
I decided to play with the punch for today’s card. There are so many ideas you can see on the internet that I chose to try my hand at these.

Vicky from vicky-wright.com and I have teamed up to give you Across the Waves Mini Blog Hop. Each Wednesday we will be sharing & featuring a project created with a nominated Stamp Set or Bundle.
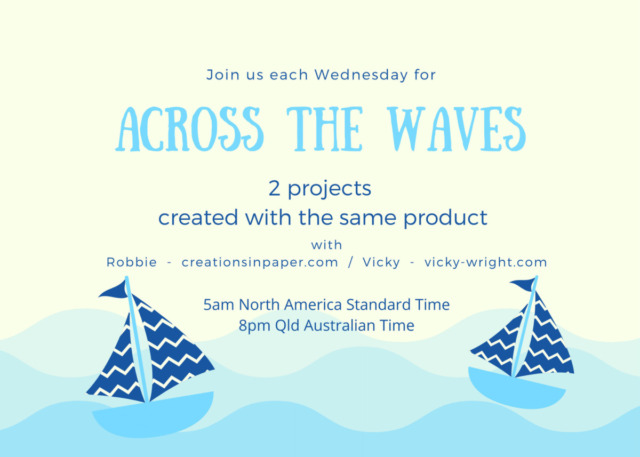
This month our focus is on the Hello Ladybug bundle
I played with making a flower and a butterfly for my the Stampin’ Up Ladybug Builder punch. The butterfly was pretty easy but the flower was challenging to get it to come out looking like a flower. Check out the center of the flower! I decided to add some ribbon for added interest.

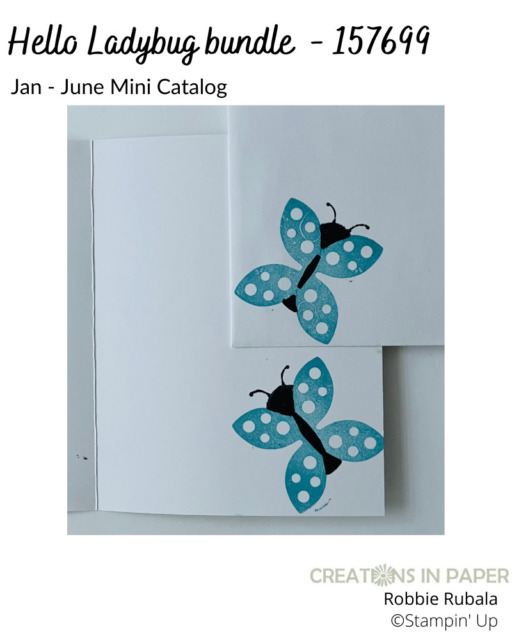
I did some experimenting with the stamps in the set to create the butterfly on the inside of the card and envelope. It is ok but I think I need to work on it some more. lol
If you missed the card with the cute ladybug, check it out here. Since ladybugs are not just red, here is an adorable one in Petal Pink.
Now to see what Vicky created with this bundle, click the image below and check out her card.

Here are the measurements and step by step to make today’s Stampin’ Up Ladybug Builder punch card.
Measurements
Card Base: White 5 1/2″ x 8 1/2″ scored at 4 1/4″
Basic Gray: 4″ x 5 1/4″
Heart & Home pattern paper: 3 7/8″ x 5 1/8″
Basic Black: scraps for punching
Crushed Curry: scraps for punching
White: scraps for stamping and punching
Let’s Make it
- fold and burnish the card base
- add the Heart & Home pattern paper to the Basic Gray panel
- glue the Basic Gray panel to the card front
- use the wing punch and the Crushed Curry to punch out 4 wings
- take 1 of the wings and add a glue dot to the middle section between each wing, use this wing to straddle one of the other wings so you have 4 petals in an arc
- repeat the above step with the other 2 wings
- join the 2 sets of petals you have created to form a flower – you may need to play with the placement a bit to get the flower shape – when you have it in the shape you like add some glue to the bottom petals so they stay in place
- cut/punch a 3/4″ circle from black and add it to the center of the flower
- cut two 2″ strips of the Black & White gingham ribbon, cut the ribbons in half on the long side
- cut three 2″ strips of White baker’s twine
- take 3 of the Black and White gingham ribbon and the 3 strips of baker’s twine, holding them together tie them together using another piece of the baker’s twine
- add the ribbon to the center of the flower dot using a glue dot
- punch the ladybug body from Black
- stamp the wings on a scrap of White using Balmy Blue, repeat to get 2 wings
- stamp the dots on the wings using Memento Tuxedo Black ink, punch out the wings
- add the wings to the ladybug so the curved edges are next to each other using glue dots, see photo above
- add the flower to the upper left hand of the card using dimensionals
- add the ladybug under the flower so it is flying toward the flower using dimensionals
February Host Code: R4RQEF7T
Use this host code when your order is under $150 and receive a free gift from me! If your order is over $150, please do not use this code, but you’ll still get the free gift.
***Make sure that you can see my name on the final checkout page listed as your Demonstrator when you order so that you know that you’re ordering with me and you’ll get my rewards!
Shopping Cart for the Stampin’ Up Ladybug Builder Punch card
Product List")


 Gingham Ribbon")


Have you been convinced to join us for our Stamp Camp yet? There is still time to register to make 8 fun cards!
Thanks for visiting me today and I hope you will be joining us. Let me know what you make with the Stampin’ Up Ladybug Builder Punch!
Such a cute card Robbie. Love the butterfly & flower.
Thanks Vicky!